


Today's tutorial features one of my most favorite Stampin' Up! baby sets of all time... Made With Love! Isn't this set just spectacular! Check out all of the images below & you will see what I mean!

FYI ... this stamp set is on the Stampin' Up! retiring list! If you love it as much as I, you may just want to make sure you purchase it before May 31st! After that it's adios amigos! Okay now let's get on with today's tutorial! Today it's all about paper piecing!


Stampin’
Up! Supplies Required:
- Made With Love Photopolymer Stamp Set & Coordinating Clear Blocks
- Basic Black Archival Stampin' Pad
- Stampin' Up! Whisper White, Smoky Slate, Real Red, Night of Navy, & Crushed Curry Cardstock
- Baby’s First Framelits Dies
- Layering Ovals Framelits Dies
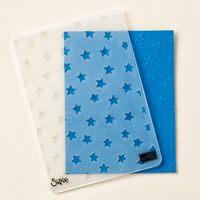
- Lucky Stars Textured Impressions Embossing Folder
- Stampin' Up! Big Shot
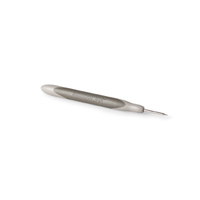
- Paper-Piercing Tool
- Mini Glue Dots
- Multipurpose Liquid Glue
- Fuse Fast Adhesive
- Stampin' Dimensionals
- Paper Snips
- Stampin' Trimmer
Measurements:
·
The main card base is Smoky
Slate. It is your standard card base & will measure 8 & ½ inches by 5
& ½
inches. You will score & fold it on the long edge at 4 ¼
inches.
·
You will also require a piece
of Whisper White cardstock that will measure 4 inches by 5 & ¼ inches. This
will be the mat that you dry emboss with the Lucky Stars Embossing Folder.
·
You will require 3 strips of
cardstock (1 in each color: Real Red, Night of Navy, & Crushed Curry) that
will measure 5 inches long by ½ inch in width. These will be pieced together & appear
behind your T-Shirt/Oval focal point.
·
To stamp the T-Shirts, you will
require 5 - 3 by 3 inch pieces of cardstock (1 in each color: Whisper White,
Smoky Slate, Real Red, Night of Navy, & Crushed Curry).
·
You will cut out a Whisper
White Oval using the Layering Ovals Framelits Dies.
It will measure 2 & ⅜ inches in diameter.
·
You will also cut out a Smoky
Slate Scalloped Oval using the Layering Ovals Framelits Dies. It will measure ~
2 & ½ inches in diameter.
·
Lastly you will also require a
scrap piece of Whisper White Cardstock for the bib overlay (1 by 1 inch).
Instructions:
1.
Stamp the T-Shirt Stamp (as
shown in the images below) in Archival Black Ink onto each of the 3 by 3 inch
pieces of cardstock. One in each color: Real Red, Smoky Slate, Crushed Curry,
Whisper White & Night of Navy.

2. Using your Big Shot Machine
& your Stampin’ Up! Dies cut out the T-Shirts with the coordinating
Thinlet. If you don’t own the Thinlets &/or Big Shot you can also use your
scissors to fussy cut them out.

3. Next you are going to take your
Paper Snips and cut out the Real Red, Night of Navy, & Crushed Curry
Stripes from those colored T-Shirts. We will be adhering these stripes to the
Smoky Slate T-Shirt to give it a multicolored stripe effect (as shown in the
sample picture below). You only need to fussy cut every 3rd stripe,
as those are the ones we will be adhering. If you like, you could cut the
others out also, & then use them to make another similar card.

4. Next we will be adhering those wee little colorful stripes of cardstock to the gray shirt. But wait! I have a trick for you! You will love this! To make it easier to adhere these fine little pieces all you will need is your Paper-Piercing Tool & a Mini Glue Dot! Now take that wee glue dot & roll it between your fingers to create a sticky little ball. Adhere that glue dot ball to your Paper-Piercing tool. This will now be your picker upper tool! It works great, as you will see in the example below! You're welcome!

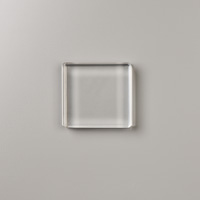
5. As you can see in the image
above, I have taken a clear block (that one came with my Stampin’ Up! Paper
Pumpkin Kit) and applied some Multipurpose Liquid Glue in a little pile. I have
then taken my homemade picker upper tool, & used it to pick up my wee piece
of the striped T-Shirt. I then dipped it in the glue (you can smear any excess
glue off on your block). You don’t want too much glue as it will ooze all over
your project and you will end up with a sticky mess!
6. Adhere all the colored stripes
to your gray T-Shirt as shown & when you are finished you will have a
lovely striped shirt, just like the one pictured below!

7. Next in line are the white
cuffs, diaper rim, & collar for the shirt. To create these, you take the
T-Shirt that you have stamped on the Whisper White cardstock & you fussy
cut the cuffs, diaper rim, & collar areas. You then adhere these in the
same way as the T-Shirt stripes. If this is too much for you, you could just
leave them as is, or color them in white with a white chalk marker.

8. Next you need to stamp the
“Happy Hour” Bib Stamp onto the Whisper White Oval that you have precut. Use
the T-Shirt to guide where you want to stamp your bib ahead of time. We are
again stamping in Basic Black Archival Ink from Stampin’ Up!

9. You will then lay your lovely
handmade T-Shirt over the stamped bib. This way just the strings will show (as
shown in the bottom left photo). You will now stamp the bib once more, this
time on your scrap piece of Whisper White Cardstock. You will then cut it out
with your Big Shot Die (or scissors if you don’t own a Big Shot &/or the
coordinating Dies). Adhere this piece to your T-Shirt using a Stampin’
Dimensional! & Voila!!! Your layered shirt is pretty much complete!

10. Lastly, to finish off your card you will dry emboss the Whisper
White Cardstock piece with your Lucky Stars Textured Impressions Embossing
Folder & your Big Shot. You will adhere your 3 colored strips of cardstock
to this piece, & then trim the edges with your Paper Snips or Stampin’
Trimmer. Assemble the rest of your card so it looks like the one below!

This technique might seem tedious, but you can change it up depending on the lined image that you are using. Fewer lines = simpler cuts! The wonderful thing about Paper Piecing, other than the fabulous look, is that you only need your black ink, some cardstock, and your paper snips to get started! That’s what makes this technique perfect for both new & experienced stampers! So, what do you say? Step it up, or take it down a notch, you can do it! Just give it a try!
I hope you enjoyed today's tutorial! Feel free to email me with any questions you might have! & If you are in Canada please check out my online Stampin' Up! Supply Shop! It's open 24/7!
Happy Stamping!
Carolynn 💖


Such a fabulous tutorial and that is the best tip for a "paper picker upper!" I will be doing that for all those tiny little pieces from here on out! So glad to be on the Technique Zone DT with you!!
ReplyDelete-Maria
I'm so happy to be on the team with you too Maria! You're pretty amazing! 💖💖💖
DeleteNice post! This is a very nice blog that I will definitively come back to more times this year! Thanks for informative post. my articles
ReplyDelete